
Garage Door Force Adjustment: How to Calibrate Your Opener for Safe Operation
Your garage door opener uses force settings to control how hard the motor pushes and pulls during operation. When these settings are correct, the door opens and closes smoothly, stops when it should and reverses immediately if something gets in the way. When they’re wrong, you get doors that won’t close completely, reverse unexpectedly or—worse—fail to stop when they hit an obstruction.
Garage door force adjustment is one of the most important maintenance tasks for any automated garage door. Getting it right protects your family, your vehicles and the door mechanism itself. This guide explains how force settings work, when they need adjustment and how to calibrate them safely.
What Is Garage Door Force Adjustment?
Every garage door opener has controls that regulate how much power the motor applies when moving the door. These force settings determine whether the door can overcome normal resistance (like friction in the tracks and the weight of the door) while still being sensitive enough to detect and respond to obstructions.
Most openers have two separate force controls: one for the upward (opening) direction and one for the downward (closing) direction. These are typically small dials or screws located on the motor unit, often labelled “Up Force” and “Down Force” or marked with arrows indicating increase and decrease directions.
The force settings work alongside travel limits (which control where the door stops) and safety sensors (which detect objects in the door’s path). All three systems must be properly calibrated for the door to operate safely and reliably. Force adjustment works in conjunction with your safety sensors—learn more about how garage door sensors work to understand how the auto-reverse system detects obstacles and triggers the reversal mechanism within two seconds as required by Australian standards.
Why Proper Force Settings Matter
Correct force calibration serves two critical purposes: safety and longevity.
From a safety perspective, the force settings determine whether your door will stop and reverse if it contacts a person, pet or object. Australian safety standards require garage doors to reverse within two seconds of hitting an obstruction. If your down force is set too high, the door may push through resistance rather than reversing—potentially causing injury or damage.
From a longevity perspective, incorrect force settings strain the entire system. If the force is too low, the motor works harder than necessary trying to move the door, generating excess heat and accelerating wear. If the force is too high, the door slams into its stops with unnecessary impact, stressing the tracks, springs, cables and the motor itself.
Finding the right balance means using just enough force to move the door smoothly through its full travel while maintaining sensitivity to unexpected resistance. Understanding your opener’s complete mechanism helps with proper calibration—our guide on how garage door opener systems work explains the relationship between motors, drive mechanisms, and obstacle detection features.
Signs Your Garage Door Needs Force Adjustment
Several symptoms indicate your force settings need attention:
Door reverses before closing completely: The down force may be too low—the motor senses normal resistance as an obstruction and triggers the safety reverse.
Door doesn’t reverse on contact: This is dangerous. If the door continues pushing after hitting an object, your down force is too high. Test regularly by placing a solid object under the door—it must stop and reverse immediately.
Door stops mid-travel: The force setting for that direction may be insufficient to overcome normal mechanical resistance.
Motor strains or makes grinding noises: This suggests either a mechanical problem or force settings that need recalibration.
Door slams shut or opens aggressively: Excessive force causes harsh operation that accelerates wear on all components.
Tools You’ll Need
Garage door force adjustment requires minimal tools:
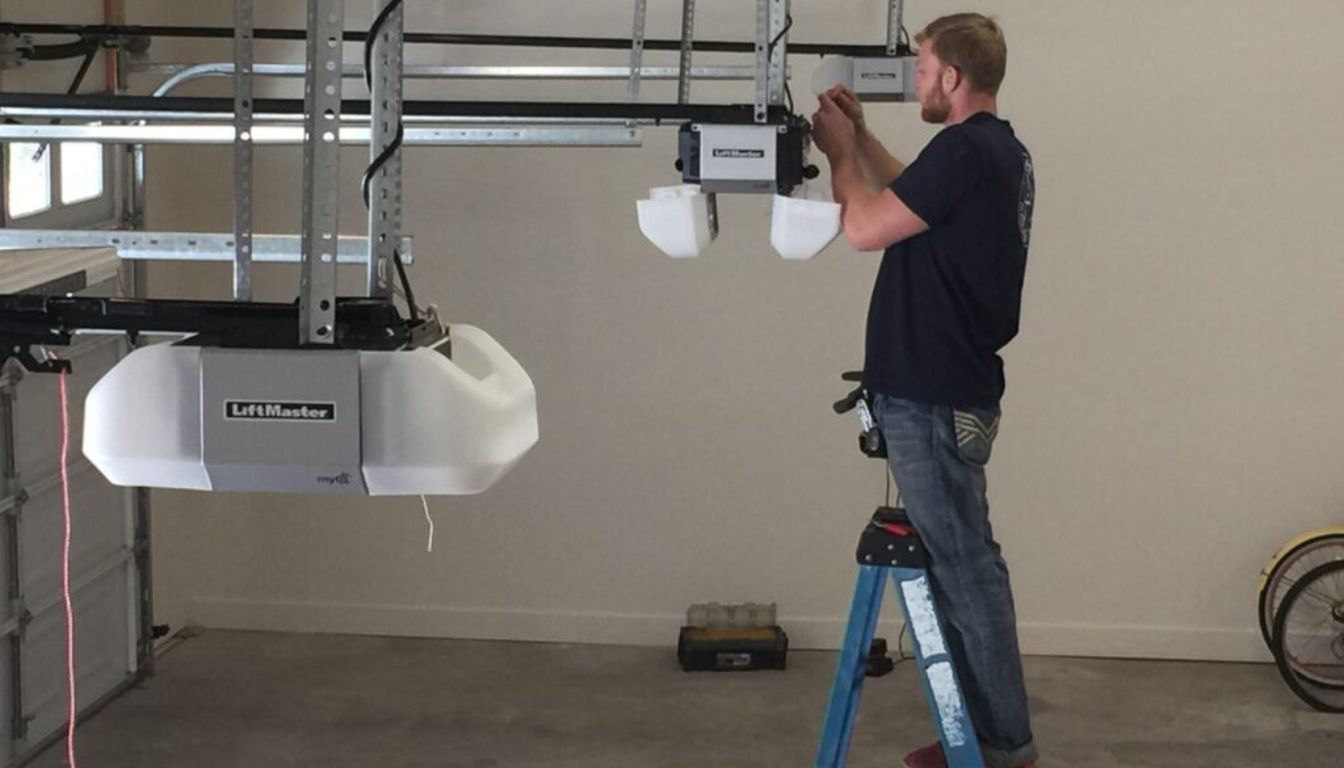
- Step ladder to reach the opener unit
- Screwdriver (flathead or Phillips, depending on your opener model)
- Your opener’s manual (for model-specific instructions)
- A solid object for testing safety reversal (brick, timber block)
- Safety glasses and gloves
Before starting, ensure the door is operating normally with no visible damage to springs, cables or tracks. Force adjustment cannot fix mechanical problems—it’s about calibrating a properly functioning system.
How to Adjust Garage Door Force Settings
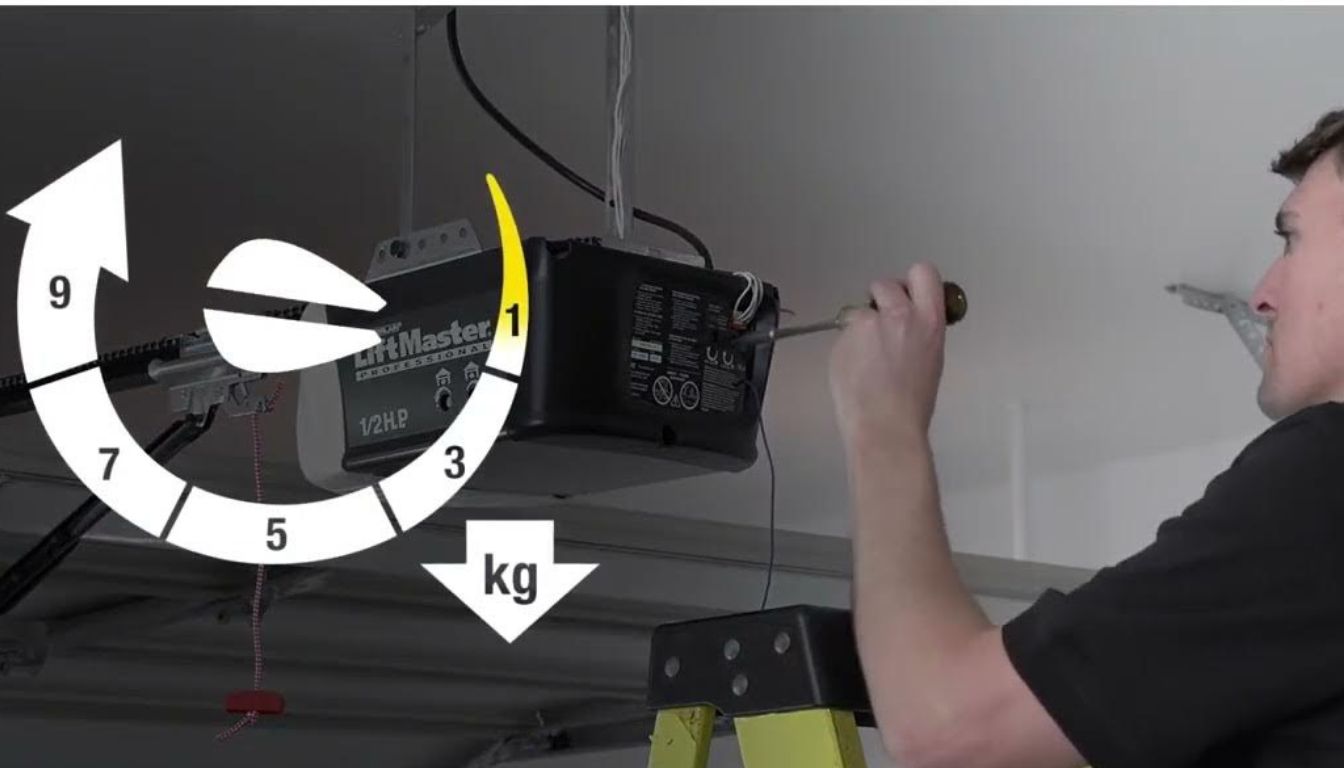
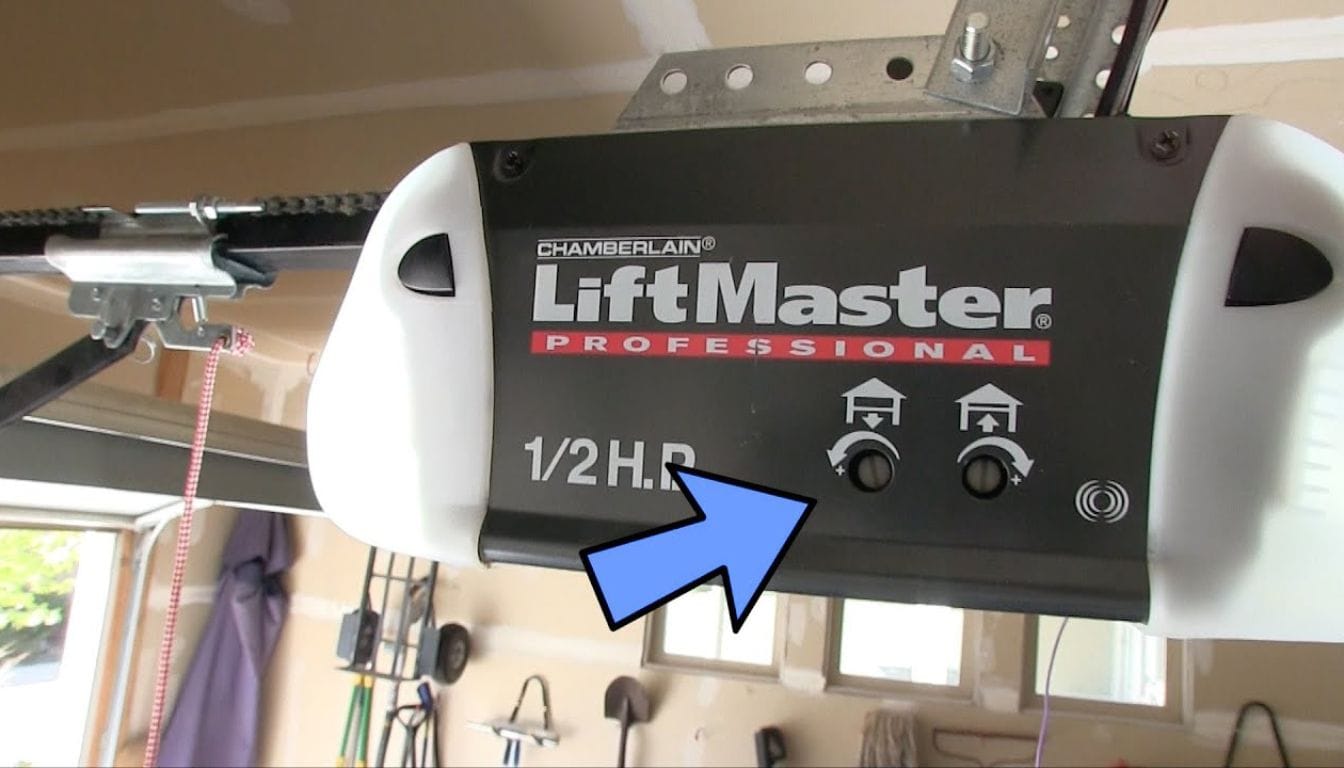
Step 1: Locate the Force Adjustment Controls
Find the force controls on your opener unit. On most residential openers, these are small dials or screws on the back or side of the motor housing. They’re typically marked “Up Force” and “Down Force” or with directional arrows.
Some newer smart openers use digital controls accessed through a programming menu rather than physical dials. Consult your manual for the specific procedure.
Step 2: Test Current Operation
Before making changes, run the door through several complete cycles. Watch and listen carefully:
- Does the door travel smoothly in both directions?
- Does it stop precisely at the floor and fully open position?
- Are there any hesitations, jerks or unusual noises?
- Does the safety reverse function work? (Test with an object under the door)
Note any problems—this helps you identify which force setting needs adjustment.
Step 3: Adjust the Upward (Opening) Force
If the door struggles to open, stalls partway up or the motor strains during opening, increase the up force slightly. Turn the dial or screw clockwise in small increments—typically quarter-turns.
After each adjustment, test the door’s operation. You’re looking for smooth, steady travel without excessive motor noise. The door should reach its fully open position without straining.
Avoid over-increasing the force. The goal is the minimum force needed for reliable operation, not maximum power.
Step 4: Adjust the Downward (Closing) Force
The down force requires more careful calibration because it directly affects safety reversal.
If the door reverses before reaching the floor, increase the down force slightly—again, quarter-turn increments. Test after each adjustment until the door closes completely and compresses the bottom seal gently against the floor.
If the door fails the safety reversal test (doesn’t stop and reverse when hitting an obstruction), decrease the down force. This is critical—a door that won’t reverse is a safety hazard.
Step 5: Fine-Tune and Verify
Once both directions operate smoothly, run multiple complete cycles to confirm consistent behaviour. Then perform these essential tests:
Balance test: Disconnect the opener (pull the manual release) and lift the door manually to waist height. A properly balanced door should stay in position when released. If it falls or rises, the springs need professional adjustment before force settings will work correctly.
Safety reversal test: Place a 40mm thick object (like a piece of timber) flat on the floor in the door’s path. Close the door—it must stop and reverse within two seconds of contact. If it doesn’t, reduce the down force and retest.
Sensor test: Wave an object through the sensor beam while the door is closing. The door should stop immediately. If your door continues to reverse even after force adjustment, the issue may lie with your safety sensors—our garage door sensor repair guide explains how to clean, realign, and troubleshoot malfunctioning sensors that can interfere with proper door operation.
Common Problems and Solutions
Door still reverses after increasing down force: Check that travel limits are correctly set. If the down limit extends past the floor, the motor senses resistance and reverses. Adjust the travel limit so the door stops with gentle compression.
Adjustments don’t seem to change anything: Some openers require running a learning function after manual adjustments. Check your manual for a “learn” or “calibrate” procedure.
Door works in one direction but not the other: This suggests a mechanical issue—perhaps a spring losing tension or a cable problem. Force adjustment won’t fix mechanical faults.
Force keeps needing readjustment: Frequent recalibration indicates an underlying problem like worn springs or failing rollers. Address the mechanical issue rather than continually adjusting force.
When to Call a Professional
Force adjustment is a straightforward DIY task when the door is mechanically sound. However, call a professional if:
- The door fails the balance test (springs need attention)
- You notice damaged cables, worn rollers or bent tracks
- Adjustments have no effect or don’t hold
- The safety reversal won’t work regardless of force settings
- You’re uncomfortable working around the opener mechanism
If your garage door reverses unexpectedly or fails to close completely after adjusting force settings, our comprehensive garage door troubleshooting guide covers additional issues like photo eye alignment, limit switch adjustments, and remote syncing problems.
Frequently Asked Questions
How often should I check my garage door force settings?
Test the safety reversal function monthly using an object placed under the door. Full force recalibration is typically only needed when you notice operational problems or after any maintenance work on the door mechanism.
Can incorrect force settings damage my garage door?
Yes. Excessive force causes unnecessary stress on tracks, springs, cables and the motor, accelerating wear and potentially causing premature failure. Insufficient force makes the motor work harder, generating heat that shortens its lifespan.
Why does my door reverse when nothing is blocking it?
This usually indicates the down force is set too low—the motor interprets normal resistance as an obstruction. It can also result from misaligned safety sensors, incorrect travel limits or mechanical issues causing excessive resistance.
Is garage door force adjustment safe to do myself?
Yes, adjusting the force dials on your opener is safe for DIYers. However, never attempt to adjust torsion springs or work on components under spring tension—these require professional expertise and specialised tools.
What’s the difference between force settings and travel limits?
Force settings control how hard the motor pushes. Travel limits control where the door stops. Both must be correctly calibrated—force for smooth operation and safety reversal, limits for proper open and close positions.
Get Expert Help With Your Garage Door
Whether you need assistance with force adjustment, opener servicing or any garage door concerns, professional help is just a phone call away. Proper force calibration should be part of your regular maintenance routine—follow our complete garage door maintenance and servicing checklist to keep your opener, springs, and tracks in optimal condition for safe and smooth operation.
A1 Garage Doors Gold Coast provides expert garage door servicing across the Gold Coast and Brisbane. Our technicians can diagnose force-related issues, identify underlying mechanical problems and ensure your safety systems function correctly. With a 4.9-star rating and experience since 2020, we’ll have your door operating safely and smoothly.
Call (07) 5515 0277 to book a service or get expert advice on your garage door opener.