
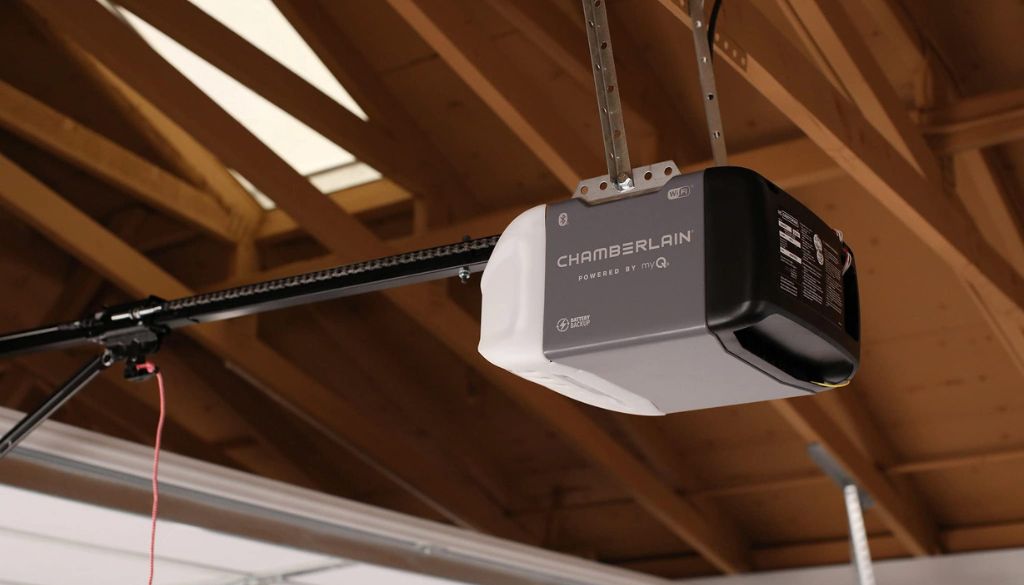
Garage Door Motor Hums But Door Won’t Move: Causes & Fixes
If your garage door motor hums but the door doesn’t move, you’re dealing with one of the more confusing faults a homeowner can face. The humming tells you the opener has power — but something is stopping it from translating that electrical energy into movement. On the Gold Coast, where salt-laden coastal air accelerates wear on rollers, springs, and drive components, this fault is more common than you might think.
This guide walks you through every likely cause, a step-by-step DIY checklist, and a clear signal for when it’s time to call the professionals at A1 Garage Doors Gold Coast. If you’re dealing with a more urgent situation, our emergency garage door repair guide covers what to do when you need help fast.
Why Does a Garage Door Motor Hum Without Moving?
A humming motor is a motor under load — it’s trying to run but can’t complete the movement. Understanding the source of that blockage is the key to fixing it quickly and cheaply. The most common causes fall into four categories. For a broader look at opener and mechanical faults beyond just humming, our full garage door troubleshooting guide is a useful companion to this article.
1. Physical Blockages and Door Locks
The simplest explanation is often the right one. A manual lock that’s been accidentally left engaged, a piece of debris caught in the track, a child’s toy wedged under the door, or even warped timber at the bottom of an old door can all bring the motor to a dead halt. The opener strains against the resistance, hums, and then trips its internal safety cutout.
* Check the manual lock bar on the inside of the door
* Inspect both tracks along their full length for objects or dents
* Check the door’s bottom seal for swelling or ground-level obstructions
2. Disengaged Trolley or Drive Components
Most automatic openers use a trolley that rides along a drive rail. Pulling the red emergency release cord (designed for power outages) disconnects the trolley from the drive. If the cord was pulled and not re-engaged, the motor will spin freely while the door stays put — and hum under the load of its own friction.
Beyond the release cord, the coupler — the plastic or nylon fitting that connects the motor shaft to the drive mechanism — can crack or slip over time. When the coupler fails, the motor spins but produces zero torque on the door. If you’re unsure which opener type you have, our garage door opener comparison breaks down chain-drive, belt-drive, and screw-drive systems so you can identify yours and locate the right components.
3. Worn or Stripped Drive Gears
Inside most chain-drive and screw-drive openers sits a plastic worm gear. It’s a deliberate design choice: the plastic gear is the weakest link in the drivetrain, meant to fail before the motor does. Once the teeth strip away (you’ll sometimes hear a grinding sound accompanying the hum), the opener motor runs freely while the drive shaft sits idle.
A gear kit replacement is a moderately achievable DIY job — but it requires disassembling the motor housing, so follow manufacturer diagrams carefully or call a technician.
4. Electrical and Capacitor Failure
The start capacitor in your motor is the component that gives the motor its initial torque spike when you press the button. A failing capacitor means the motor hums at startup but can’t generate enough rotational force to move the door. This is a very common failure point for openers over five years old, especially in humid coastal climates like the Gold Coast.
Signs of capacitor failure include a hum that gets louder over successive attempts, a motor that sometimes works if manually helped to start rotating, and visible bulging or leaking on the capacitor itself when you open the motor cover.
Tip: Ignoring a persistently humming motor can cause it to overheat and burn out within days. A motor replacement typically costs several times more than a capacitor or gear repair — act early.
Step-by-Step DIY Troubleshooting
Step 1: Safety First
Before you touch anything mechanical:
* Disconnect the opener’s power at the wall outlet or circuit breaker
* Make sure the door is fully closed or safely supported — never work under a suspended door
* Do not touch springs or cables under any circumstances; they store extreme tension
Step 2: Check for Physical Blockages
With the power off, manually lift the door using the emergency release handle. If the door won’t lift by hand, or feels unusually heavy, you likely have a spring problem — call a professional, as spring work is dangerous. If it lifts freely, the issue is in the drive system or electrical components.
Inspect both tracks from floor to ceiling. Look for dents, bends, or misalignment; rollers that are cracked, flat-spotted, or seized; and debris or foreign objects caught in the track.
Step 3: Re-Engage the Trolley
Locate the red emergency release cord hanging from the trolley carriage. Pull it firmly toward the door (not toward the motor) until you hear or feel a click. This re-engages the carriage with the drive. Reconnect power and test.
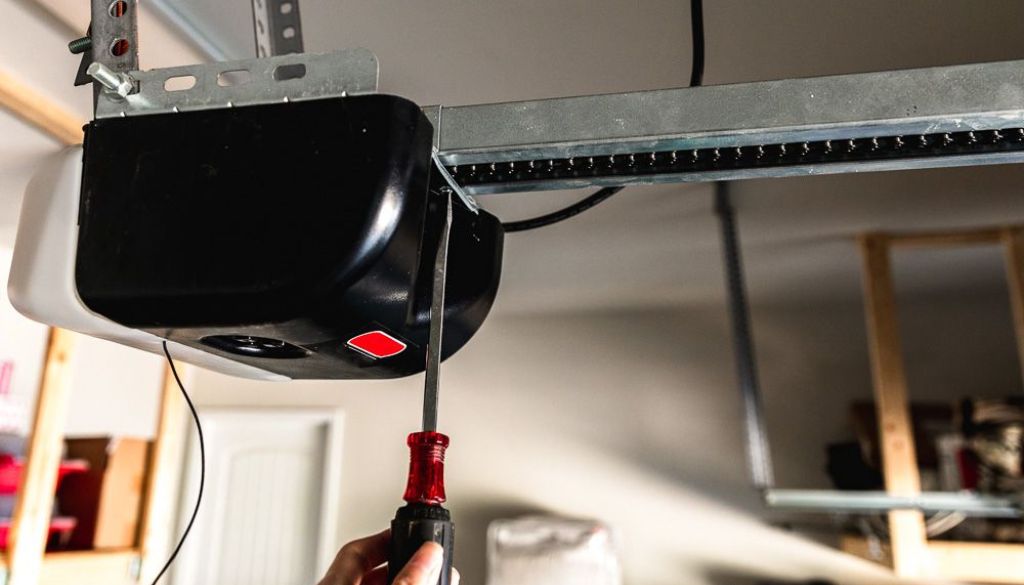
Step 4: Inspect Drive Components
With the power off, open the motor housing cover (usually two screws) and inspect the drive gear for shredded plastic or missing teeth, the coupler for cracks or slippage, and the chain or belt — it should have approximately 25mm of sag. Too loose or too tight can prevent the door from moving.
If the gear is visibly damaged, a gear kit (available from most hardware stores or directly from the opener manufacturer) is your fix. If the coupler is loose, tighten or replace it.
Step 5: Test the Start Capacitor
This step requires a basic multimeter set to capacitance mode. Discharge the capacitor safely before testing — it holds a charge even when the opener is unplugged, so short the terminals briefly with an insulated screwdriver. Compare the reading to the rating printed on the capacitor’s casing. A reading below 10% of the rated value means the capacitor needs replacing.
If you’re not comfortable with electrical testing, skip this step and call a licensed technician — the capacitor stores enough charge to cause a painful shock.
Step 6: Lubricate and Balance the Door
Lubricate all moving parts with a silicone-based or lithium-based garage door lubricant (avoid WD-40 — it attracts dust and dries out quickly). Apply to hinges and pivot points, rollers (at the bearing, not the wheel), torsion spring coils, and the drive chain or belt sparingly.
Then test door balance: disconnect the opener, lift the door manually to waist height, and let go. A balanced door should stay in place. A door that falls or rockets upward has spring tension problems that will overload your motor every time it operates.
Gold Coast’s Trusted Garage Door Experts — If your garage door motor is humming and the door won’t budge, don’t wait until the motor burns out. A1 Garage Doors Gold Coast has been serving the Gold Coast since 2020 with a 4.9/5 customer rating and same-day service available. Call now: (07) 5515 0277
Quick Troubleshooting Reference
| Symptom | Likely Cause | DIY Action | Next Step |
|---|---|---|---|
| Hums, door stuck | Door jammed or locked | Check tracks, remove obstruction | Re-test opener |
| Hums, trolley disengaged | Red release cord pulled | Pull cord toward door to re-engage | Re-test remote |
| Hums, gear shredded | Drive gear worn out | Replace gear kit | Call technician if unsure |
| Hums, coupler loose | Coupler slipping | Tighten or replace coupler | Test under load |
| Hums, no movement at all | Seized motor / capacitor failure | Do not force — disconnect power | Call professional immediately |
Preventive Maintenance: Stopping the Hum Before It Starts
In a coastal environment like the Gold Coast, regular garage door maintenance matters more than it does inland. Salt air corrodes metal components, humidity swells timber door panels, and temperature swings cause tracks to expand and contract. Every six months you should lubricate all hinges, rollers, and springs with silicone lubricant; check and adjust chain or belt tension per the manufacturer’s spec; test the auto-reverse safety feature by placing a 50mm timber under the door and pressing close (the door should reverse on contact); inspect the bottom seal and replace if cracked; and test door balance with the opener disconnected.
If you have a composite garage door, pay particular attention to spring tension during your six-monthly checks. The additional weight of composite panels puts more strain on the opener motor with every cycle, and a spring that’s even slightly under-tension will cause the motor to labour — which is exactly the kind of cumulative load that leads to humming and eventual burnout.
Proactive maintenance typically extends opener life by three to five years and prevents the most common failure modes that lead to that telltale hum.

When to Call a Professional
Some jobs fall firmly outside the DIY category. Call a licensed garage door technician at A1 Garage Doors Gold Coast if the motor hums and you can smell burning or see smoke, if springs look stretched or broken, if cables are frayed or off the drum, if the door is visibly off-track or panels are buckled, if repeated gear replacements haven’t fixed the hum, or if you’re not confident testing electrical components safely.
Attempting spring or cable work without professional training risks serious injury. The energy stored in a torsion spring is equivalent to a significant impact — a snapped spring can cause life-altering harm. If the situation has escalated to the point where the door is completely inoperable, read our emergency garage door repair guide before you attempt anything further.
Frequently Asked Questions
Is it safe to keep pressing the button if my motor is humming?
No. Each press forces the motor to draw maximum current against a stalled load. You risk overheating the motor windings or tripping the thermal overload — and if the overload trips repeatedly, you can permanently damage the motor. Identify and fix the cause before operating the opener again. Our garage door troubleshooting guide covers additional opener faults that may be occurring alongside the hum.
How much does it cost to fix a humming garage door motor on the Gold Coast?
Costs vary depending on the fault. A gear kit repair is typically the most affordable fix. A capacitor replacement is a low-cost part with moderate labour. A full motor replacement is the most expensive option. Before committing to a replacement opener, it’s worth reading our garage door opener comparison so you know what to look for. A1 Garage Doors Gold Coast offers transparent assessments — call (07) 5515 0277 for a same-day quote.
My opener is only two years old. Why would it hum?
Young openers can develop hums from a door that’s out of balance, a coupler that wasn’t fully tightened during installation, or a chain that’s become slack. These are all easily corrected. Humidity and salt air on the Gold Coast can also accelerate early wear on plastic components, so check the coupler and gear even on newer units.
Need a garage door technician on the Gold Coast? A1 Garage Doors Gold Coast is rated 4.9/5 by local homeowners and offers same-day call-outs. Whether it’s a humming motor, a broken spring, or a full opener replacement — our team has it covered. Call (07) 5515 0277 · 1 Waterford Ct, Bundall QLD 4217 ·