
How to Install Garage Door Weather Stripping
If you’ve noticed water pooling inside your garage after rain, dust blowing in on windy days, or daylight visible under the door when it’s closed, your weather stripping is either worn out or missing altogether. Replacing it is one of the simplest and most cost-effective upgrades you can make to your garage — and it’s well within the ability of most DIY-capable homeowners. Fresh weather stripping does more than keep out draughts — it’s also your first line of defence against the moisture that causes ice bonding at the base of your door on cold nights. Once your seals are replaced, take a look at our guide on preventing a frozen garage door in cold weather to get the full picture of winter door protection.
This guide covers everything you need to know about installing garage door weather stripping: the different seal types, how to choose the right one for your door, the tools you’ll need, and a clear step-by-step process from removal through to testing. If your garage door has bigger issues — sticking, making unusual noises, or refusing to close properly — our garage door troubleshooting guide is a good starting point for diagnosing the problem before you focus on sealing.
What Is Garage Door Weather Stripping?
Weather stripping is the flexible seal material fitted around the edges of your garage door to close the gaps between the door and the frame. On most garage doors, stripping is installed in three zones: the bottom edge of the door (the most critical seal), the sides where the door meets the jambs, and the top where the door panel meets the header.
These seals serve multiple purposes. They block rain, dust, leaves, and insects from entering the garage. They reduce drafts that affect the temperature inside, which matters if you use your garage as a workshop, gym, or storage space for temperature-sensitive items. And they dampen noise — both from outside traffic and from the door’s own operation. For homeowners who’ve already insulated their garage door, weather stripping is the finishing piece that makes that insulation effective. Our article on garage door insulation explains how insulation and sealing work together to improve energy efficiency.
Types of Garage Door Weather Stripping
Bottom Weather Seals
The bottom seal handles the toughest job — bridging the gap between the moving door and the fixed garage floor. There are several profiles to choose from.
Rubber and vinyl seals are the most common. They slot into a retaining channel (usually aluminium or PVC) along the bottom edge of the door and compress against the floor when the door closes. T-shaped and bulb-shaped profiles are standard for sectional doors, while flat or angled profiles suit tilt-up doors. Brush seals are an alternative for uneven floors, using dense bristles to conform to irregular surfaces without creating drag.
Threshold seals are floor-mounted rather than door-mounted. They’re a rubber or vinyl strip fixed to the garage floor just inside the door line, creating a raised barrier that the door closes against. Thresholds work well as a secondary seal or when the door-mounted channel is damaged beyond repair.
Side and Top Weather Stripping
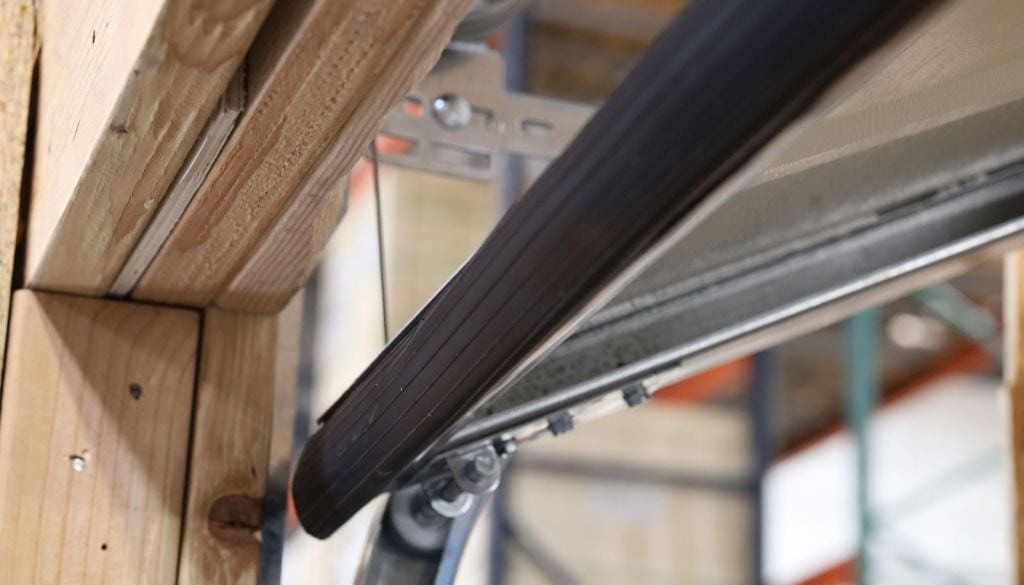
Side seals (also called jamb seals) and top seals are typically brush strips, foam compression strips, or flexible fin seals. They attach to the door frame rather than the door itself, and press against the face of the door when it’s closed. These seals handle less stress than the bottom seal, so they tend to last longer, but they still wear down over time — especially in coastal environments where salt air degrades rubber and foam faster.
Choosing the Right Seal
Match the seal to your door type. Sectional doors almost always use a T-profile or bulb bottom seal that fits into a standard retaining channel. Roller doors typically use a brush or fin seal at the bottom and sides. Tilt-up doors may use a flat rubber strip or a threshold seal depending on floor clearance. When in doubt, take the old seal to your local hardware store for a profile match, or measure the retaining channel width — most Australian sectional doors use a standard channel that accepts common replacement seals.
Tools and Materials You’ll Need
Gather these before you start: a tape measure, a utility knife or heavy-duty scissors for cutting the seal to length, a flat-head screwdriver or pry bar for removing the old seal, a soft brush or cloth for cleaning the channel, silicone spray lubricant (for feeding the new seal through the channel), and a small amount of dishwashing liquid mixed with water as an alternative lubricant. Safety gloves are recommended, particularly when handling old, stiffened rubber that can have sharp edges.
For side and top seals, you’ll also need a drill or screwdriver for fixing the strips to the frame, and possibly a hacksaw if you’re cutting aluminium retainer strips to length.
Safety and Preparation Before Installation
If your garage door is automatic, disconnect the power to the opener before starting. Either unplug the unit from the ceiling outlet or switch it off at the circuit breaker. This prevents the door from activating while you’re working underneath it.
For bottom seal installation, work with the door in the fully open position and secured — either with vice grips on the tracks or by having a second person hold it. This gives you clear, safe access to the bottom edge of the door. Clear away any vehicles, bikes, or items stored near the door so you have room to work freely on both sides.
Step-by-Step: How to Install Garage Door Weather Stripping
Measure the Door and Select the Correct Seal
Measure the full width of the garage door and add 50 to 100 millimetres to your measurement. You’ll trim the seal to a precise fit after installation — it’s always easier to cut excess than to stretch a seal that’s too short. Check the width of the retaining channel on the bottom of the door to confirm the seal profile you need.
Remove the Old Weather Stripping
The bottom seal on most sectional doors slides out of a channel that runs along the bottom edge. Look for a retaining cap or screw at one end of the channel — remove it, then slide the old seal out sideways. If the seal has hardened and is stuck, a flat-head screwdriver can help ease it loose. For side and top seals fixed with screws or adhesive, unscrew the retainer strip or peel the old seal away from the frame.
Clean and Prepare the Channel or Surface
Once the old seal is out, clean inside the channel thoroughly. Scrape away any old adhesive, dirt, or debris with the screwdriver, then wipe the channel with a damp cloth. A clean channel makes a significant difference — the new seal will sit correctly, slide freely, and last longer. If you’re also noticing grease or grime on the tracks while you’re down there, our guide on how to remove grease from garage door tracks explains how to clean them properly without causing damage.
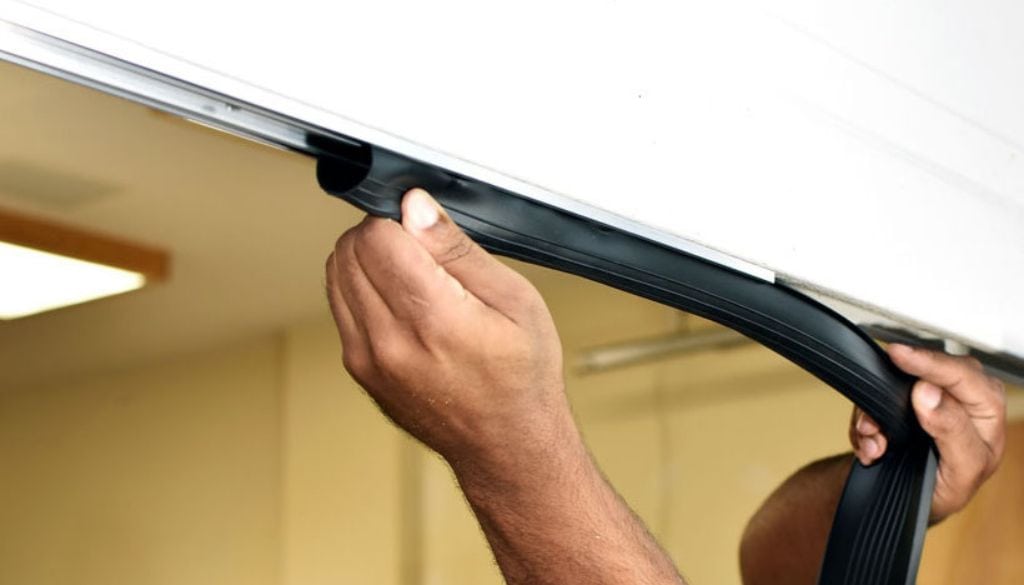
Install the New Bottom Weather Seal
Spray a light coat of silicone lubricant inside the channel, or wipe soapy water along its length — this helps the new seal slide through smoothly. Starting from one end, feed the seal into the channel opening and work it across the full width of the door. If the channel has a centre bracket or support, you may need to work from both ends toward the middle.
Once the seal is in position, pull it taut so it sits evenly without bunching, then trim the excess with a utility knife. Replace any retaining caps or end screws to prevent the seal from sliding out during operation. Lower the door to check that the seal compresses evenly against the floor along the full width.
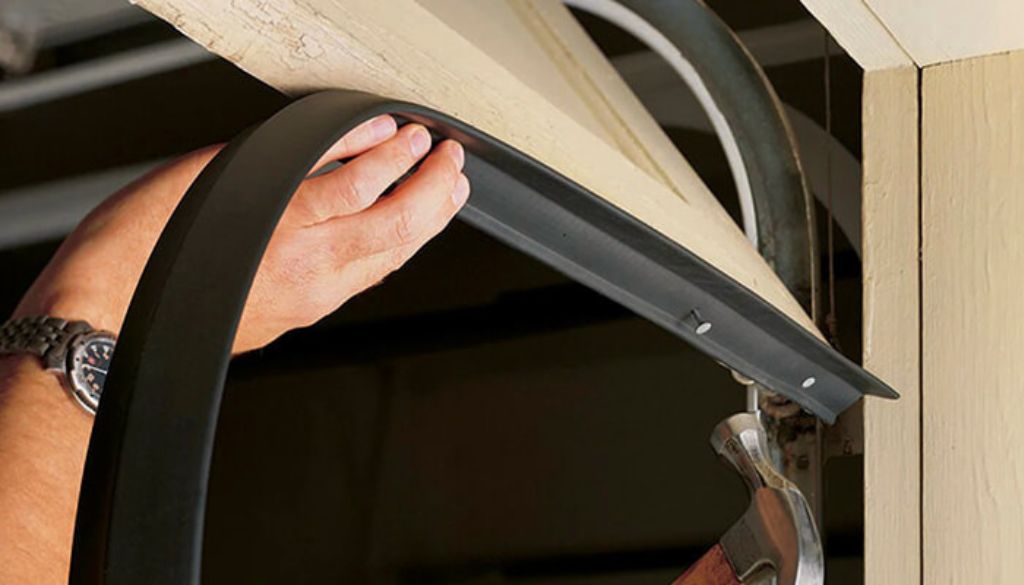
Install Side and Top Weather Stripping
Side seals are fitted to the door jambs — the vertical frame members on each side of the opening. Position the seal so it presses against the face of the closed door with light compression. Mark the screw holes, drill pilot holes if needed, and fix the retainer strip in place. Repeat on the opposite side. Top seals are fitted to the header in the same way. Brush seals and fin seals are the most forgiving options here, as they conform to slight irregularities in the door face without creating excessive friction.
Testing the Seal After Installation
Close the garage door fully and check for visible gaps. The simplest test is the torch test — have someone stand inside the garage with the lights off while another person shines a torch along the edges of the closed door from outside. Any light leaking through indicates a gap that needs attention.
For water sealing, run a hose gently along the bottom edge of the door and check inside for any moisture getting through. If the seal is doing its job, the floor should stay dry.
Finally, open and close the door several times — both manually and with the opener — to confirm the new stripping doesn’t interfere with operation. If the door struggles to close or the opener reverses, the seal may be too thick or positioned too tightly, and you’ll need to adjust. If your opener’s limit settings need recalibrating after the install, our article on garage door opener types and features covers how different opener systems handle these adjustments.
Common Mistakes to Avoid
Buying the wrong seal profile is the most frequent error — a seal that doesn’t match your channel width will either fall out or refuse to fit. Always check the channel dimensions before purchasing. Stretching rubber seals during installation weakens them and causes them to shrink back over time, leaving gaps. Feed the seal gently and let the lubricant do the work. Over-tightening side seals against the door face creates excessive drag that strains the opener and wears the seal out prematurely — light, even compression is the goal.
How Often Should Weather Stripping Be Replaced?
Most garage door weather stripping lasts three to five years under normal conditions. On the Gold Coast, exposure to UV, heat, and salt air can shorten that lifespan, particularly for bottom seals that also cop physical wear from contact with the floor on every cycle. Check your seals at least twice a year — once before the wet season and once after summer — and replace them at the first signs of cracking, hardening, flattening, or tearing.
If you’re in the habit of seasonal maintenance checks, it’s also a good time to inspect the door’s other wear items. Our guide on common rollup door problems covers the typical faults worth looking for during a routine once-over.
FAQs
How do I know if my garage door weather stripping needs to be replaced?
Look for visible signs like cracking, peeling, or gaps along the bottom and sides of your garage door. If you notice water, dust, or pests getting into your garage, or if you feel drafts of air coming in when the door is closed, your weather stripping has likely worn out and needs to be replaced. Most weather stripping lasts between 3–5 years depending on climate and usage.
What type of weather stripping is best for a garage door?
The best type depends on where it’s being installed. Rubber or vinyl bottom seals (also called astragal or retainer seals) work well along the base of the door, while V-strip or adhesive-backed foam tape is commonly used along the sides and top. For the most durable and effective seal, many homeowners opt for professional-grade rubber weather stripping, which holds up better against extreme heat, cold, and daily wear.
Can I install garage door weather stripping myself, or should I hire a professional?
While replacing a simple bottom seal is a manageable DIY project for handy homeowners, installing weather stripping along the sides, top, and between panels can be more involved — especially if the door frame is warped, damaged, or improperly aligned. A professional ensures a tight, even seal and can identify underlying issues like misalignment or structural damage that could reduce the effectiveness of new weather stripping.
How long does it take to install garage door weather stripping?
For a professional technician, a full weather stripping replacement typically takes about 1–2 hours depending on the size and condition of the door. A DIY installation may take longer, particularly if adjustments to the door frame or track are needed. Bottom seal replacements on their own are usually quicker, often completed in under an hour.
How much does it cost to replace garage door weather stripping?
The cost varies based on the type of material, the size of your garage door, and whether you hire a professional. Materials alone typically range from $20–$75, while professional installation generally runs between $100–$250 total. Investing in quality weather stripping and proper installation can save you money in the long run by improving energy efficiency and protecting your garage from water damage and pests.
When to Call a Professional
Weather stripping installation is straightforward, but there are situations where a professional should handle the job. If the retaining channel on the bottom of the door is bent, cracked, or missing, a new channel needs to be fitted before a seal can be installed — and this involves working on the door panel itself. If you’ve installed new stripping and persistent gaps remain, the issue may be a misaligned track, warped panel, or uneven floor that needs a more involved solution. And if the door itself is damaged, ageing, or operating poorly, sealing the edges is a temporary fix at best.
A1 Garage Doors Gold Coast handles everything from weather seal replacements to full door servicing for homes across the Gold Coast and Brisbane. With a 4.9-star rating and technicians who’ve been on the tools since 2020, we’ll make sure your door seals properly and operates safely.
Call (07) 5515 0277 to book a service or get a quote, or visit goldcoastgaragedoorrepair.com.au to submit an enquiry.