
Garage Door Reverse Malfunction – Why It Happens
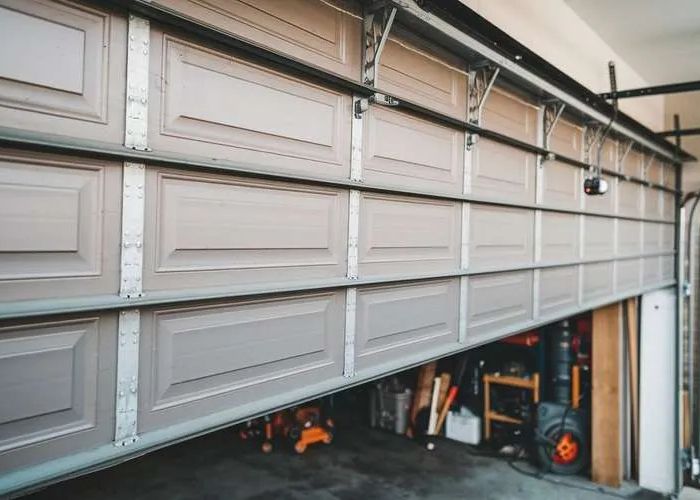
Your garage door starts to close, drops a few centimetres, then shoots back up like it hit an invisible wall. Or it reverses mid-travel with nothing in the way. Few things are more frustrating — and few issues get misdiagnosed more often. A garage door reverse malfunction can stem from sensor misalignment, worn hardware, incorrect opener settings, or something as simple as a leaf sitting on the threshold. Before calling it a lost cause or pressing that wall button fifteen times in a row, it’s worth understanding exactly what’s happening inside the system. Most causes are fixable without specialist tools, and knowing where to look can save you significant time. This guide walks through every common reason a door reverses unexpectedly, how to test each one safely, and when the problem has moved beyond a DIY fix into professional territory.
Understanding Garage Door Auto-Reverse
The auto-reverse feature is a mandatory safety mechanism built into every modern garage door opener. It exists to prevent the door from closing on a person, pet, or object — and in Australia, opener systems are required to meet safety compliance standards that mandate this protection.
There are two types of auto-reverse at work simultaneously. The first is sensor-based: a pair of photo-eye sensors sits near the bottom of your door tracks, one on each side, projecting an invisible infrared beam across the opening. If anything breaks that beam while the door is in motion, the opener reverses immediately. The second is force-based: the opener motor monitors resistance as it drives the door. If it detects more resistance than the programmed threshold — meaning the door hit something or is struggling to move — it reverses automatically.
Both systems can trigger a false reverse. When they do, the door behaves as if something is wrong even when the path looks completely clear. Identifying which system is firing is the first step to fixing it.
Common Symptoms of a Reverse Malfunction
- The door reverses immediately without touching the ground
- The door closes only when you hold down the wall button continuously
- The door closes fine in the morning but reverses in the afternoon sun
- The door reverses partway down, inconsistently and without pattern
- The door bounces off the floor seal and goes back up
Each symptom points toward a different culprit, which is why working through a methodical checklist matters.
Troubleshooting Garage Door Sensors
Photo-eye sensors cause the majority of unexplained reverse malfunctions. They’re positioned low to the ground, which makes them vulnerable to dust, debris, spiderwebs, and physical knocks.
Cleaning and alignment: Each sensor has a small LED indicator. On most systems, a solid green or amber light means the sensor is aligned and receiving signal; a blinking or absent light means it isn’t. Start by wiping the lenses with a dry cloth. Then crouch down and check that both sensors are pointing directly at each other — even a slight bump from a bin or a broom handle can knock them out of alignment. Loosen the mounting bracket, adjust until both LEDs go solid, then retighten.
Wiring issues: Follow the sensor wires back to the opener unit. Look for frayed insulation, pinched sections, or loose terminal connections. Low-voltage sensor wiring is surprisingly easy to damage, and an intermittent connection can cause the opener to read a phantom obstruction.
Environmental interference: Direct sunlight hitting a photo-eye lens is one of the most common causes of afternoon-only reverse malfunctions on the Gold Coast. The sun’s infrared light can overwhelm the sensor’s receiver, making it behave as if the beam is broken. Sensor sun shields — small hoods that attach to the mounting bracket — solve this immediately. Dust, condensation, and insects nesting inside the sensor housing can cause the same effect.
Also check the floor threshold itself. If debris, a garden hose, or a buildup of dirt sits along the bottom seal line, the sensor may be reading it as an obstruction.
Checking the Door Threshold and Obstructions
Before adjusting any settings on your opener, get down and physically inspect the entire bottom edge of the door and the floor beneath it.
Small objects — a leaf, a pebble, a cracked piece of concrete, even an uneven floor section — can cause the bottom seal to compress unevenly. When the opener’s force sensor detects that resistance, it interprets it as hitting an obstruction and reverses. This is the system working correctly, but for the wrong reason.
Quick fixes: Sweep the threshold clear, check that the bottom rubber seal is sitting flat and isn’t curled or torn at one end, and run the door again. If the bottom seal is damaged, replacing it is a straightforward job and will also improve energy efficiency — something covered in detail in our post on fixing garage door gaps for energy efficiency.
Travel and Force Settings
Every garage door opener has adjustable travel limits and force settings. Travel limits tell the opener how far to move the door in each direction before stopping. Force settings tell it how hard to push or pull before treating resistance as an obstruction trigger.
How to identify the problem: If your travel limit is set too far down — telling the door to keep moving after it’s already seated on the floor — the motor experiences the floor as resistance and reverses. If your close force is set too sensitive, the door reverses at the slightest friction from a tight track or a misaligned roller.
Adjusting safely: Most openers have manual adjustment dials or screws on the motor unit, labelled “travel” and “force” (or “limit” and “pressure”). Consult your opener’s manual — Chamberlain and LiftMaster units, which are common in Queensland homes, have detailed adjustment guides in their documentation. Make small adjustments of one increment at a time, then run a full close cycle to test. Never increase force settings as a shortcut — if the door requires extra force to move, there’s a mechanical problem that force adjustment will mask, not fix.
After any adjustment, always test the auto-reverse by placing a piece of timber flat on the threshold and closing the door onto it. It should reverse on contact. If it doesn’t, the force is set dangerously high.
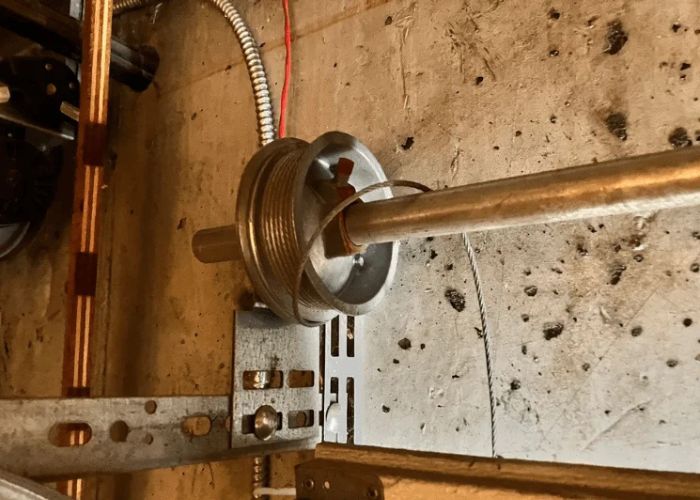
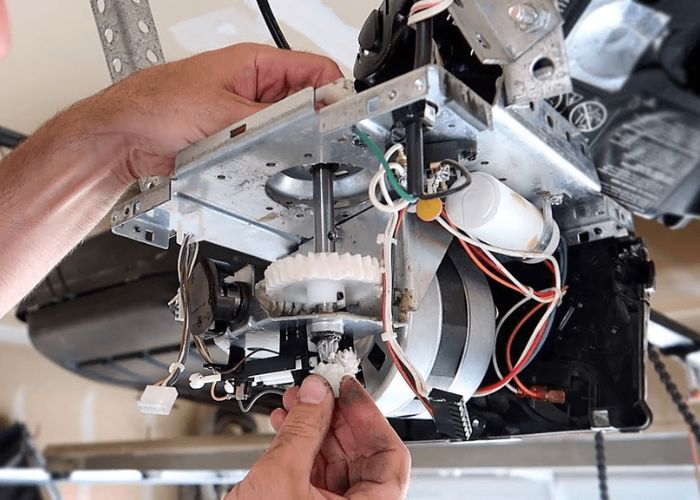
Mechanical Issues and Wear
If sensors and settings check out, turn your attention to the hardware. A door that’s fighting to move will trigger force-based auto-reverse even with perfect settings.
What to inspect: Run the door manually (disengage the opener using the red emergency cord) and feel for resistance. Check rollers for flat spots or seized bearings — worn rollers are a very common cause of increased friction in the tracks. Inspect hinges for cracking or seizing. Look along the tracks for dents, bends, or buildup of grit. Check springs for visible damage, though spring inspection should stay visual-only.
DIY vs professional: Applying a silicone-based lubricant to rollers, hinges, and tracks is safe and often immediately reduces friction. Straightening a minor track dent with a rubber mallet is manageable. However, anything involving torsion springs, cables, or re-tracking a badly derailed door should be handled by a professional. These components are under significant stored tension and can cause serious injury if handled incorrectly. For a broader look at common door faults and when they cross into professional territory, the garage door troubleshooting guide on the A1 site covers the full spectrum.
Remote and Keypad Troubleshooting
Sometimes the issue isn’t with the door or opener at all — it’s with the signal telling it what to do.
Battery and reprogramming: A low-battery remote can send incomplete or corrupted signals, causing erratic behaviour including unexpected reversal commands. Replace the batteries first. If the remote is old, it may also need to be reprogrammed to the opener — the steps vary by brand but typically involve holding the “learn” button on the motor unit.
Testing with the wall switch: If the door operates normally from the wall-mounted button but misbehaves from the remote or keypad, the issue is isolated to the signal device, not the opener mechanics. This rules out the vast majority of hardware causes. If even the wall switch triggers the reverse malfunction, the problem is with the opener unit itself or the door hardware.
Step-by-Step Troubleshooting Checklist
- Inspect and clean sensors — wipe lenses, check LED indicators, verify alignment, check wiring
- Clear the threshold — sweep debris, check bottom seal condition, look for uneven floor sections
- Test travel and force settings — compare to manufacturer specs, adjust one increment at a time, re-test the timber obstruction test after any change
- Inspect for mechanical wear — run door manually, lubricate rollers and hinges, check for track damage
- Test remote and keypad — replace batteries, reprogram if needed, isolate against wall switch
- Call a professional if unresolved — persistent reverse malfunction after completing all steps above indicates a problem requiring qualified diagnosis
Frequently Asked Questions
Why does my garage door reverse immediately with no obstruction?
Immediate reversal with nothing in the path almost always means a sensor issue — either misalignment, a dirty lens, or sunlight hitting the photo-eye receiver. Check LED indicators on both sensors and clean the lenses before anything else.
What if my garage door won’t close at all?
If the door refuses to close even when holding the wall button, the opener may have lost its travel limit data (common after power outages on some brands) or there may be a failed logic board. This typically requires a service call.
How do I know if my springs are bad?
Springs are under extreme tension and should not be tested manually. Visual signs include visible gaps in the coil of a torsion spring, a door that feels extremely heavy when manually operated, or a loud bang from the garage (the sound of a spring breaking). If you suspect spring damage, do not use the door and contact a professional immediately.
Is it safe to disable safety sensors?
No. Bypassing photo-eye sensors eliminates the system’s ability to detect people or objects in the door’s path. Beyond the obvious safety risk, it also likely takes your opener out of compliance with Australian safety standards. The correct fix is always to repair or replace the sensors.
How often should I test the auto-reverse feature?
Monthly testing is recommended. Place a flat piece of timber on the threshold and close the door — it should reverse upon contact. If it doesn’t reverse or requires significant pressure before doing so, the force setting needs adjustment.
When to Call a Professional
Some reverse malfunctions are genuinely beyond safe DIY resolution. Call a qualified technician if:
- The door has come off its tracks
- You suspect spring or cable damage
- The opener is making grinding or burning smells
- All troubleshooting steps have been completed with no change
- The door reverses unpredictably despite correct sensor alignment and settings
The team at A1 Garage Doors Gold Coast services and repairs all opener makes and models across the Gold Coast and Brisbane. With a 4.9-star rating and same-day availability for most jobs, getting a professional diagnosis is faster and more affordable than most homeowners expect. Call (07) 5515 0277 or visit goldcoastgaragedoorrepair.com.au to book a service.
If you’re also looking at upgrading your opener while you’re at it, the comparison of smart garage door openers available in Australia is worth a read before you decide.