Garage Door Troubleshooting: Common Problems and How to Fix Them
Experiencing issues with your garage door can be highly frustrating. Whether failing to open or close, making strange noises, or getting stuck halfway, any problems prevent you from quickly accessing your vehicle and storage space. When frayed cables cause your door to become stuck in the closed position, our step-by-step guide on replacing cables without lifting the door shows you how to safely address this common problem. If you’ve noticed a visible dent or warp in one of your panels, check out our detailed guide on bent garage door panel repair to learn when a fix is possible and when a full replacement is the smarter option. One of the most common yet often overlooked issues Gold Coast homeowners face during summer is an overheating garage door opener, which can trigger automatic shutdowns and prevent your door from operating until the motor cools down completely.
Thankfully, many joint garage door malfunctions can be addressed without calling for professional repairs immediately. Diagnosing and troubleshooting problems properly can save you significant time and money.
This comprehensive DIY guide to garage door troubleshooting will cover topics such as:
– Reasons your garage door won’t open or close
– Interpreting uneven movement and strange noises
– Basic maintenance for prevention
– Determining what repairs you can do vs. what requires an expert
Reasons Your Garage Door Won’t Open or Close
Has your garage door been giving you grief lately? Don’t panic – many common issues that prevent smooth opening and closing have quick fixes. Knowing why your garage door gets stuck midway or reverses uncontrollably is half the battle! If troubleshooting reveals your motor needs replacing, our roller door opener installation tips will help you choose the right unit and install it correctly the first time. When the auto-reverse mechanism triggers prematurely due to friction, you may need to recalibrate your system—our detailed garage door force adjustment guide explains how to properly set the close-force and open-force settings on your opener for safe and reliable operation.
Let’s break down the usual suspects behind faulty garage door operations into sensor problems, mechanical failures, and power supply snafus. Skim through to see if your situation matches one of these three categories:
A. Sensor and Switch Malfunctions
These pesky gadgets control when your garage door motor turns on, reverses direction, and powers down. If your photo eyes become obstructed or your limit switches get bumped out of alignment, it can block the path and confuse the opener.
Photo eyes get knocked out of whack surprisingly easily! Weather elements and accidental bumps from your car can tilt them. Verify the “eye” components have an unimpeded sightline between both sides. Wipe away any debris blocking the sensors, too.
* Similar to eyes, limit switches tell the opener when to halt movement. You’ll know it’s a switch issue if your garage door stops prematurely or closes inconsistently. The excellent news is adjustment screws make realignment simple.
* Failing to respond to automatic openers triggered by remotes indicates dead batteries or disconnected antenna wires. Easy to rectify! Reprogram the device as a precaution once swapped/secured.
B. Mechanical Breakdowns
Problems within the moving components make your garage door’s physical operation slower and more rigid. Stripped gears, broken springs, and bent tracks can seriously affect performance!
Common Culprits and Fixes:
| Issue | Solution |
| ————- | ————- |
| Broken springs | Call a pro! Torsion springs carry tremendous tension load, and trying amateur replacement risks serious injury |
| Sagging tracks | Inspect where the vertical tracks connect to the ceiling brackets. Tighten/realign loose junctures |
| Fraying cables | Another job for the pros – don’t operate doors with compromised cables. Snapping while in use risks the door crashing down |
| Rollers keep popping out | Lubricate with silicone spray * Replace old plastic wheels with heavy-duty metal ball bearing rolls |
Catching these mechanical problems quickly minimizes further component wear, like stripped opener gears.
C. Electrical and Motor Malfunctions
Garage door openers rely on steady power delivery to run smoothly like any appliance. Tripped breakers, unplugged units, faulty wiring, and dying motors can all keep that from happening!
* Check if other nearby lights work – a tripped breaker also affects additional garage outlets. Flip the switch entirely off, then on to reset the breaker.
* An unplugged motor might have loosened from the outlet. Verify it’s securely inserted and try operating the door.
* If those didn’t solve the no-power issue, the problem likely lies in damaged wiring or a worn-out motor/opener needing professional replacement.
Diagnosing whether it’s an electrical problem is straightforward – the primary power source gets disrupted, so *nothing works* until that’s addressed.
Pinpointing whether your garage door woes stem from sensors, mechanics, or electricity offers clarity! Now that you know the basics behind common operational failures, let’s cover how to decipher uneven travel and strange noises.
Diagnosing Noises and Uneven Movement
I’ll let you in on a little secret – learning to decode your garage door’s unique sounds is an invaluable troubleshooting skill. Certain noises signal particular problems! If your garage door is hanging unevenly or making unusual noises during operation, the issue could be loose or slack cables — our guide on how to tighten garage door cables walks you through the signs to watch for and when to call a professional.
Understanding what underlying issues cause uneven travel as the door opens and closes is also hugely helpful for DIY diagnosis.
Let’s explore how to interpret noisy operations and janky movement.
A. Sounding Out the Issue
Pops, squeaks, grinds – you name it, a struggling garage door makes it. Attune your ear and match noises to their meaning:
Hearing loud “popping” as the door operates likely signals broken torsion springs. The springs bear immense downward force every time the door lifts or lowers. They eventually wear out and snap.
Rollers squeaking while moving means it’s time to lubricate the wheels and track with silicone spray. Squeals indicate excessive friction. The persistent squeaking of my roller door has become quite bothersome, prompting me to seek out Roller Door Repairs for a swift and effective solution.
* Gear strip grinding creates an awful metallic crunching noise. Motor issues usually require a garage door specialist to diagnose and replace damaged parts.
* Rumbling or vibrating sensations as the door moves often stem from loose hardware. Inspect the cable pulleys, hinges, and fasteners. Tighten anything loose.
See, those disconcerting sounds become clues once matched to specific problems! Now, let’s examine uneven movement…
B. Smoothing Out the Travel
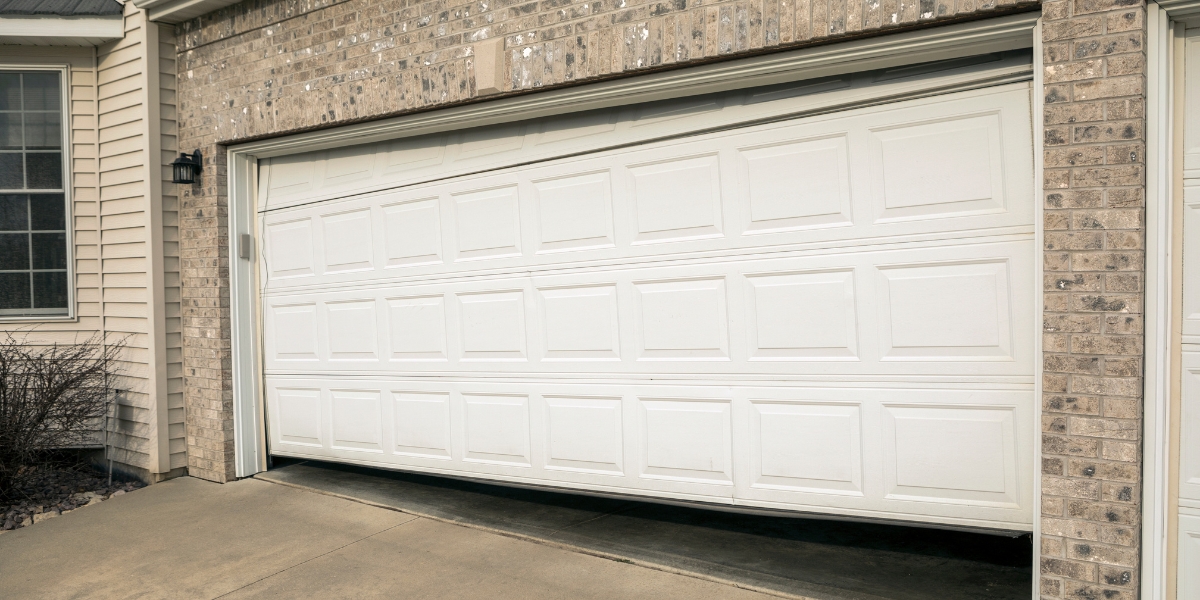
Have you noticed the garage door straining, only partially opening, or becoming crooked? Any visual unevenness warrants inspection.
* Crooked or jerky motion may happen after realigning the horizontal door tracks yourself. Ensuring the vertical tracks sit perfectly plumb counters the issue.
* Sagging springs and frayed cables make smooth operation impossible over time. Again, this requires a seasoned professional to replace these tension components.
* Double-check your safety sensor alignment for openers that reverse or only partially. Missing the visual signal tells the motor to stop prematurely or head back up.
Analyzing strange noises and uneven travel gives you the confidence to pinpoint problems early! Next, we’ll cover proactive maintenance that prevents many garage door pitfalls in the first place.
Keeping Your Garage Door in Tip-Top Shape
Want to avoid the hassle of garage door repairs altogether? I don’t blame you! Thankfully, a little regular preventative care keeps things running smoothly for years. If your door is sticking, jerking, or making grinding sounds as it moves, built-up grime on the tracks could be the culprit — our step-by-step guide on how to remove grease from garage door tracks shows you how to restore smooth, quiet operation.
Follow this starter maintenance routine to keep components clean, lubricated, and in good condition:
A. DIY Inspections and Upkeep
* Clean photo eyes and safety sensors. Once a month, gently wipe away dirt, spiderwebs, etc., obstructing the “line of sight” needed to work correctly.
* Lubricate all rollers and tracks with spray-on silicone or lithium grease twice yearly. Reduces strain on the opener motor and prevents premature wear.
* Check cables, pulleys, hinges, and fasteners. Tighten any loose hardware to avoid future noise issues or broken parts.
* Verify door, spring, and hardware balance by manually lifting halfway. Adjusts if needed.
B. Professional Upgrades
While inspecting components yourself covers basic upkeep, a few parts benefit from regular pro replacement:
* Garage door springs – Torsion springs last approximately five years. Let a technician assess the life span and replace aging springs.
* Opener motor/gear assemble – Motors often burn out after ten years. Technicians can evaluate performance and install upgraded modern openers with better security features.
* Rollers and cables – Metal rollers and galvanized cables outlast plastic wheels and average cables.
Remember – prevention protects your investment! Following essential DIY door maintenance tips and strategic upgrades by professionals ensures your system stays in tip-top shape for years of smooth, reliable service.
Video Tutorials for Common Garage Door Repairs
They say a picture is worth a thousand words – so how much is a video worth when learning DIY garage door repairs? Probably a million!
Watching step-by-step repair demonstrations makes comprehending the process way simpler. I’ll guide you through 5-10 must-see video tutorials that cover resolving frequent garage door problems. If troubleshooting reveals a worn-out motor with stripped gears or complete failure after 15+ years of use, it’s time to explore what motor replacement will cost rather than investing in temporary repairs.
A. Alignment and Adjustments
Getting components properly realigned eliminates many opening/closing issues:
* Realigning Photo Eyes Video (https://www.youtube.com/watch?v=UIP0QQvX1No) – CCTV Security Pros demonstrate adjusting the sensors
* How to Rebalance Garage Door (https://www.youtube.com/watch?v=SXmU243fU-o) – Great overview by Vaughn Door Specialists
* Adjusting Limit Switches (https://www.youtube.com/watch?v=vKp3fJANpco) – Helpful step-by-step from Garage Door Guru
* Replace Remote Antenna (https://www.youtube.com/watch?v=4EfYuViYCBg) – Quick fix when opener doesn’t respond
Getting your garage door parts aligned properly again eliminates many functionality problems.
B. Component Repairs and Service
Certain repairs like lubricating rollers or replacing springs keep everything running smoothly:
* Lubricating Rollers (https://www.youtube.com/watch?v=744oyqm2UNI) – Cara Bailey provides excellent DIY steps
* Replacing Broken Cable (https://www.youtube.com/watch?v=S8-SE_6P9jI) – Visual guide from Garage Door Nation
* How to Replace Garage Door Springs (https://www.youtube.com/watch?v=tfNJe_TuJnk) – Torquemaster overview from Dallas Garage Door Expert
Remember, safety comes first! Wear protective equipment when attempting component repairs.
Hopefully, this selection of video tutorials reinforces the key troubleshooting takeaways and shows what professional repairs look like up close. Watching an expert technician complete the job makes trying it yourself less intimidating.
Evaluating DIY vs. Professional Repairs
Alright, question time – which garage door repairs can you safely DIY vs. better to the professionals? These are excellent things to consider before grabbing your toolbox!
Evaluating your technical skill level and physical capability honestly is critical. Also, recognize complications that require specialized expertise and equipment.
A. DIY If You Can…
* Adjust sensors, remotes, switches, and opener limits
* Clean tracks and lubricate rollers/joints
* Tighten loose hinges, pulleys, cables, and handles
* Ensure door, springs, and hardware are balanced
* Replace individual rollers and cracked/loose panels
Those represent straightforward fixes achievable with basic mechanical competence and hand tools.
B. Seek Pros When…
* Replacing springs – wrong torque or tension risks the door crashing down
* Re-cabling openers – unique winding bars apply extreme force
* Realigning bent tracks – hammering tracks while installed damages the ceiling
* Replacing bad bearings/gears – specialized tools required to access opener internals
* Upgrading motors – electrical risks and precision adjustment involved
DIYers who know their limits keep everyone safe while minimizing repair bills! Evaluate each malfunction and determine if it exceeds your experience. There’s no shame in calling pros when advanced expertise is needed. If you’re noticing water seeping in, drafts along the edges, or pests finding their way into your garage, the problem is likely worn or missing seals — our guide on how to install garage door weather stripping explains how to fix this common issue quickly and affordably.
Knowing When to Call the Pros
We’ve covered a ton of DIY garage door troubleshooting – but sometimes it’s safest to hire a professional service call. Facing frequent sensor or motor issues? Explore Smart Garage Troubleshooting with modern opener solutions.
How do you know when to throw in the towel and phone for expert backup? Ask yourself these questions:
* Does the repair require lifting/removing heavy door panels?
* Are extension ladders needed to reach areas like motors or tracks?
* Do I have the specialized tools for this task?
* Is electrical wiring involved at any point?
* Could the fix lead to injury if done incorrectly?
If you answered “yes” to any of those, immediately contact a licensed garage door technician. Search sites like HomeAdvisor or Angi to read reviews and compare experts. If your garage door reverses unexpectedly or refuses to close all the way, the safety sensors at the base of the tracks are likely misaligned — our guide on how to fix garage door sensor alignment walks you through the steps to get everything back on track.
While learning DIY repair skills saves money in the long term, don’t risk personal harm or property damage to avoid paying for professional help. Prioritize safety above all else!
Frequently Asked Garage Door Questions
You’ve made it to the lightning round! I’ll tackle a rapid-fire selection of the most common customer questions about garage door repairs and maintenance:
Why does my garage door reverse before hitting the ground?
This annoying problem happens when the auto-reverse mechanism gets tripped prematurely. Adjust the close-force setting screw on the opener motor clockwise to reduce sensitivity. That prevents false alarms from friction triggering reversal.
How do I resync my wireless keypad with the opener?
Simple coding issues cause keypad/remote desyncing. First, replace batteries if applicable. Then locate the learn button on the opener motor and push it – you’ll have 30 seconds to enter a PIN on the keypad to sync them.
What’s the easiest way to realign sagging rollers?
Unscrew the roller bracket’s U-bolt until the wheel sits evenly within the track again. Leave a bit of wiggle room, then re-tighten the bolts carefully. Repeat adjustment with other rollers as needed.
Should I replace the extension or torsion springs myself?
I advise homeowners always to hire pros for spring replacements! But if I had to choose, torsion springs pose a much more significant injury risk from tension load. Extension springs still carry dangers, though, and aren’t DIY-friendly either.
Why did my remote and wall switch suddenly stop opening the door?
A broken antenna wire is likely the culprit, assuming your opener light still works. Locate the wire dangling from the motor unit head and re-screw it firmly to restore connectivity.
Conquering Garage Door Repairs
We’ve covered everything from diagnosing garage door problems to performing routine maintenance and common fixes. You now know how to troubleshoot issues causing spotty operation, plus keep things running smoothly for years.
While DIY solutions can fix many opener and mechanical failures, pay attention to the value of professional repairs when true expertise is needed. Investing in pro installation and component replacements ensures safe, reliable long-term function.
Stay confident tackling fundamental realignments, cleaning, lubrication, and fixes like tightening hardware or replacing individual rollers. But also recognize your limits – extension ladders, electrical risks, and tensioned parts deserve leaving to the licensed technicians.
With this comprehensive garage door troubleshooting guide under your belt, noisy operators and uneven travel have met their match. Put your new repair skills to work, returning smooth functionality to your garage access point. Thanks for reading – here’s to quieter, better-operating doors ahead!


